
Why Getting the Right Size Matters
Many incontinence-related leaks (and resulting skin problems) are not caused by a faulty absorbent product – but instead, they happen because the product doesn’t fit right. Even the highest-capacity, most dependable protective underwear or tape-tab brief won’t do its job correctly if there are gaps in the leg holes, the material bunches up around the belly button or there are other telltale signs of a bad fit.
At the same time, everyone’s body is different, so an individual’s height and weight combination might not match up to the size indicated for a specific product. And when you add in other variables like larger or smaller body statures; missing limbs; or hernias, cysts and other body bumps, finding the right size can be tricky.
In this article we will examine how to get the most precise measurements for incontinence products, so they do what they’re supposed to do to help individuals manage loss of bladder or bowel.
- Ways to Determine Size
- Using a Tape Measure
- Using a Size Chart
- How a Good Fit Should Look
- Problems with a Bad Fit
- Take the Next Step
Ways to Determine Size
The two most common ways to find an individual’s size are by using a tape measure or a size chart.
1. Using a Tape Measure
You will need a standard tape measure (Clinicians or Caregiving Professionals: contact me and I will send you a Tranquility® tape measure if you would like one!).
If the person is standing up:
- Find the widest part of the person’s body between the waist and hip.
- Measure this area and use that to determine the size

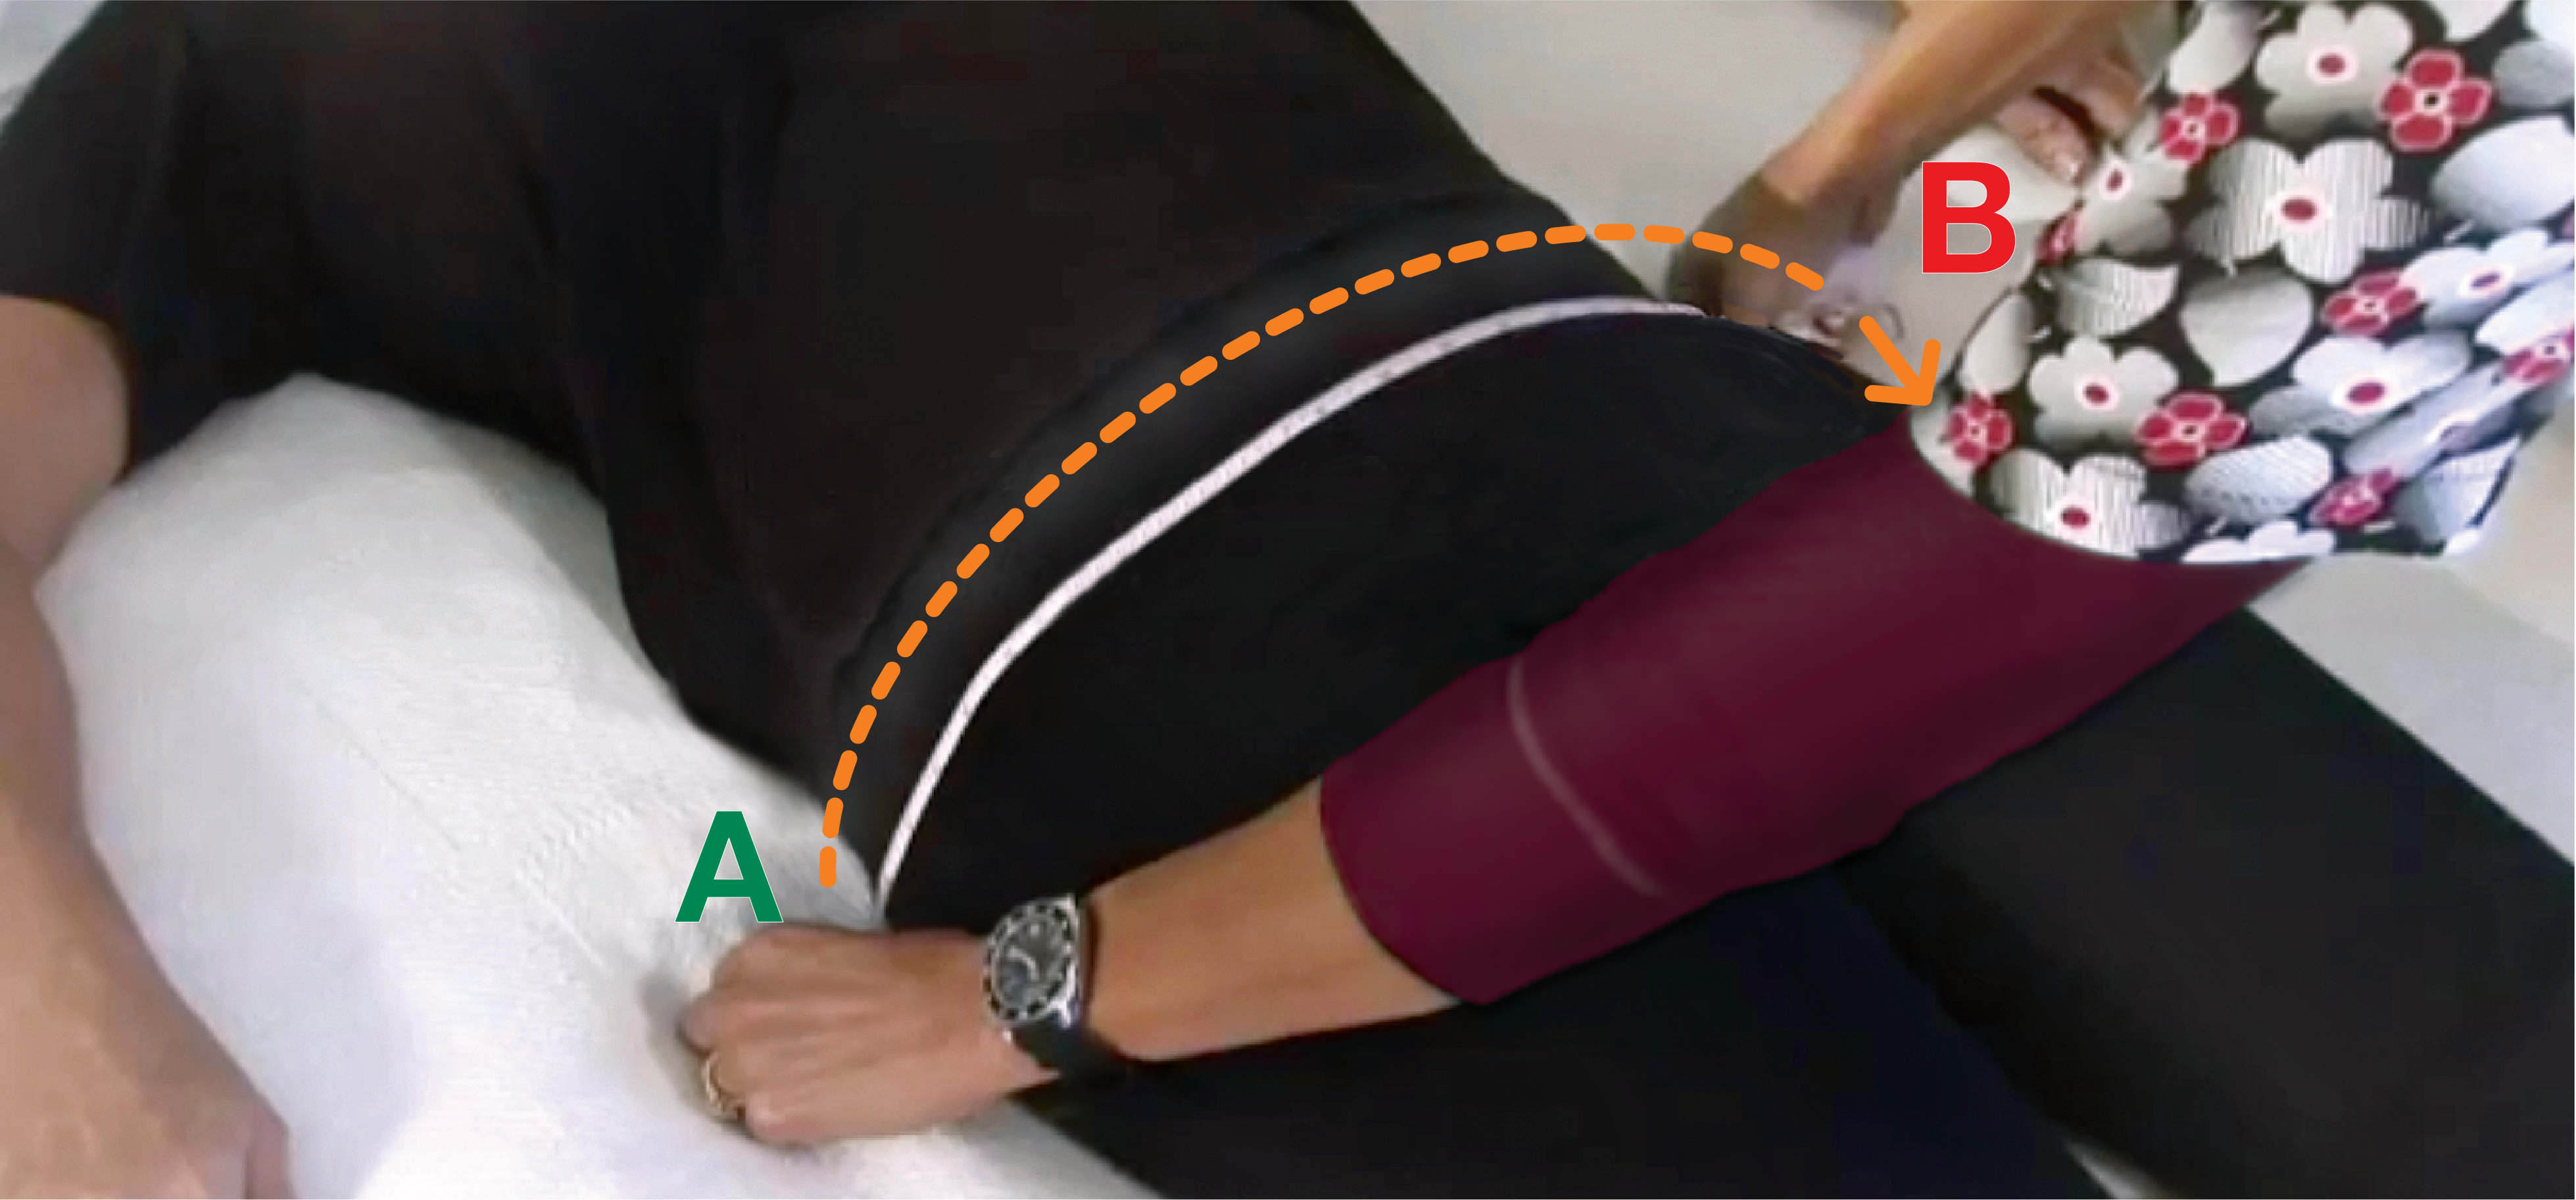
If the person is lying down (supine position):
• Measure at the hips, sheet to sheet
◦ Start with the tape touching the bed and run over the widest part to the opposite side
◦ End touching the bed, directly next to the person’s body
• Double that measurement to determine the total waist size
2. Using a Size Chart
Size charts are usually on the side of the product package. They may vary in formatting and use different units of measurement, including waist size or body weight. Here’s how to use some different types of charts:

Table charts:
- Match the person’s weight or the waist/hip size to the corresponding size
- If the number falls between two sizes, start with the smaller size
Graf charts:
- Find the individual’s height on one axis
- Find the individual’s weight on the other axis
- Draw lines from these two points to determine where they intersect
- Where the lines cross is the person’s size
- If the intersection point lands on or near the border of two sizes, going with the bigger size usually works better
Keep in mind that sizing charts are not always perfect; the sizes shown are recommendations, not a guarantee.
How a Good Fit Should Look

Here are a few tips to help determine if an absorbent product fits appropriately.
• A Tape-Tab Brief should fit snugly with the placement of the tape tabs on the hips and no gaps around the legs
• Pull-On Protective Underwear should fit snugly, with the core touching the perineum/crotch with no gaps around the legs
Here is additional sizing advice from the NAFC (National Association for Continence):
- The product should lie flat across the belly
- From the side, the brief should sit evenly in front and back
- The top tab or tape should point down to tighten the waist and stop leaks
- The bottom tabs should angle slightly up to tighten around the legs
- If there is a wetness stripe, it should be in the middle
- Avoid having extra material bunch up on the sides
- Leg openings should feel comfortable, not too tight
Problems with a Bad Fit

Here are things to look for that could lead to a poor fit, likely resulting in wet clothes or bedding.
- The tabs or tape meet in the middle of the front, meaning it’s too large
- If the brief is too loose in the leg holes, it won’t seal and could leak
- If it doesn’t fully cover both cheeks, it’s probably too small
Bonus tip: Getting Briefs Ready to Use
Briefs come tightly packed in their bag. To make them work and fit better, take a few seconds to prime them for use with these techniques:
- Unfold the product, then re-fold it once down the middle
- Run your hands quickly down the center
- You’ll feel it get fluffier and the leg bands will pop out (this helps it soak up liquid faster)
Take the Next Step
The sizing guide is just a starting point. You could try all the ideas in this article and still not get the perfect fit. If you or your patient needs additional help with sizing or would like to try multiple samples, contact your Tranquility rep for a free consultation. Don’t have a rep? Feel free to email me at pschwartzbauer@pbenet.com or complete this form. I’m here to help!

Pamela Schwartzbauer
Clinical Lead, National Sales
Tranquility® Incontinence Products
Pam has been in healthcare for 35 years, with a degree in Nursing. Her nursing background includes Long-Term, Home Care and Acute Care. For more information or questions about this article, please contact Pam or complete this form.


